Tread Wisely: A Comprehensive Guide to Extending the Lifespan of Your Car Tires

Tread Wisely: A Comprehensive Guide to Extending the Lifespan of Your Car Tires

Introduction

Your car’s tires are the unsung heroes of the road, bearing the weight of your vehicle and ensuring a smooth and safe journey. However, many drivers overlook the importance of proper tire maintenance, leading to premature wear and tear. In this comprehensive guide, we will delve into the essential practices that can significantly extend the lifespan of your car tires, ensuring both your safety and your wallet. Plus, we’ll introduce a handy tool – the wheel brush – that can be a game-changer in maintaining your tires.

  1. Proper Inflation

One of the simplest yet most crucial aspects of tire maintenance is maintaining proper inflation. Underinflated or overinflated tires can lead to uneven wear and reduced fuel efficiency. Regularly check your tire pressure using a reliable gauge and ensure they match the recommended levels specified in your vehicle’s manual. This simple step can significantly contribute to extending the life of your tires.

  1. Regular Rotation

Tire rotation is an often-overlooked practice that can make a substantial difference in tire longevity. Due to variations in weight distribution and steering mechanisms, tires wear unevenly. Rotating your tires at regular intervals promotes even wear, ensuring that each tire sustains a similar amount of stress over time.

  1. Wheel Alignment

Misaligned wheels can cause tires to wear unevenly and prematurely. Regular wheel alignments, typically recommended every 6,000 to 8,000 miles, can correct alignment issues, enhancing tire lifespan and improving overall vehicle performance.

  1. Balancing Act

Wheel balancing is another critical element in tire maintenance. Unbalanced wheels can lead to uneven wear and vibrations, causing discomfort during your drive. Regularly balancing your wheels, especially when you install new tires, can help distribute weight evenly, preventing premature wear.

  1. Mind Your Driving Habits

Your driving habits play a significant role in the lifespan of your tires. Avoid sudden stops, sharp turns, and excessive speeding, as these actions can put unnecessary stress on your tires, leading to quicker wear. Drive responsibly, and your tires will thank you with extended longevity.

  1. The Role of the Wheel Brush

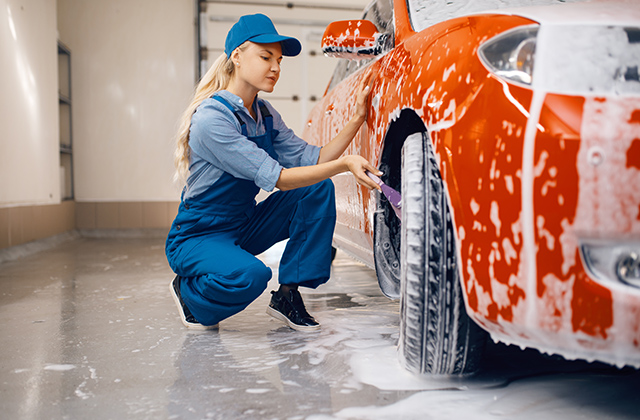
Introducing the wheel brush – a valuable tool in your tire maintenance arsenal. While many car owners focus on cleaning the body and windows, neglecting the wheels is a common oversight. A wheel brush is designed to reach the nooks and crannies of your rims, removing brake dust, dirt, and grime that can contribute to corrosion and premature wear.

Regularly cleaning your wheels with a wheel brush not only enhances the aesthetic appeal of your vehicle but also prevents the accumulation of corrosive substances that can degrade the rubber of your tires. Invest in a quality wheel brush and make it a part of your routine car care.

Conclusion

In the journey of car ownership, taking care of your tires is an investment that pays off in safety, performance, and cost savings. By following these comprehensive guidelines and incorporating a wheel brush into your regular maintenance routine, you can significantly extend the lifespan of your car tires. Tread wisely, and your tires will roll smoothly for miles to come. Always include car detailing products in your list if you purchase for a car tyre cleaner.

Say Goodbye to Water Spots: How a Car Blower Dryer Can Transform Your Car Wash

Say Goodbye to Water Spots: How a Car Blower Dryer Can Transform Your Car Wash

Have you ever spent hours meticulously washing your car, only to be left with annoying water spots once it dries? Water spots can be frustrating and can make your car look less than pristine. Fortunately, there is a solution that can revolutionize your car wash routine and eliminate those pesky water spots: the car blower dryer. In this article, we will explore how a car blow dryer can transform your car wash experience, leaving your vehicle spotless and gleaming.

1. Understanding the Problem: What are Water Spots?

Water spots are mineral deposits left behind when water evaporates on the surface of your car. These deposits contain minerals such as calcium and magnesium that are naturally present in water. When the water evaporates, these minerals remain on the car’s surface, creating unsightly spots that can be difficult to remove. Water spots are especially noticeable on dark-colored vehicles, making them a common annoyance for car owners.

2. The Downside of Traditional Drying Methods

Traditional car drying methods, such as using a towel or allowing the car to air dry, often contribute to the formation of water spots. Towels can inadvertently leave behind tiny fibers or lint, which can stick to the car’s surface and mar its appearance. Air drying, on the other hand, allows water to evaporate naturally, leaving behind mineral deposits. These methods can be time-consuming, ineffective, and result in an imperfect finish.

3. Introducing the Car Blower Dryer: How Does It Work?

A car blower dryer is a specially designed tool that uses powerful jets of air to blow water off the surface of your vehicle. It works by creating a controlled stream of air that effectively pushes water out of hard-to-reach areas such as side mirrors, grille openings, and crevices. The adjustable speed and temperature settings allow for a customized drying experience, ensuring that every nook and cranny of your car is thoroughly dried.

4. The Benefits of Using a Car Blower Dryer

Using a car blower dryer offers numerous benefits that can transform your car wash routine:

a. Spot-Free Drying

By eliminating the need for towels or allowing the car to air dry, a car blower dryer ensures spot-free drying. The powerful blasts of air remove water droplets before they have a chance to form water spots, leaving your car with a flawless, showroom-ready finish.

b. Time and Energy Saving

Compared to traditional drying methods, using a car blower dryer can save you valuable time and energy. The high-speed air jets quickly and efficiently dry your vehicle, reducing the overall time spent on the drying process.

c. Minimizes Scratches and Swirl Marks

Towels and other drying materials can inadvertently cause scratches or swirl marks on your car’s paintwork. With a car blower dryer, you eliminate the risk of introducing these imperfections, ensuring a scratch-free and swirl mark-free finish.

d. Versatility and Convenience

Car blower dryers are designed with versatility and convenience in mind. They come with a range of attachments and nozzles that allow you to adjust the airflow according to different areas of your vehicle. Whether it’s drying the intricate details of your dashboard or reaching tight spots in your engine bay, a car blower dryer provides the flexibility needed to achieve thorough and efficient drying.

e. Enhanced Paint Protection

Properly drying your car is essential for maintaining its paintwork. Water spots and lingering moisture can lead to paint damage, such as oxidation and corrosion. By using a car blower dryer, you ensure that every surface is dried thoroughly, minimizing the risk of long-term damage and preserving the integrity of your vehicle’s paint.

5. Step-by-Step Guide: Using a Car Blower Dryer for an Effective Car Wash

Now that you understand the benefits of using a car blower dryer, let’s walk through a step-by-step guide on how to incorporate this tool into your car wash routine:

Step 1: Thoroughly Wash Your Car

Begin by washing your car using your preferred car wash solution and a high-quality wash mitt or sponge. Rinse off all the soap residue using a hose or pressure washer.

Step 2: Start Drying with the Car Blower Dryer

Once you’ve rinsed your car, it’s time to bring out the car blower dryer. Begin by selecting the appropriate attachment or nozzle for the task at hand. Use the blower dryer on the lowest setting to remove excess water from the larger surfaces of your vehicle, such as the roof, hood, and doors.

Step 3: Target Hard-to-Reach Areas

Next, adjust the airflow and nozzle to target hard-to-reach areas like side mirrors, door handles, and grille openings. The controlled stream of air will effectively push water out of these crevices, preventing water spots from forming.

Step 4: Dry Wheels and Tires

Don’t forget to dry your wheels and tires thoroughly. Use the blower dryer to eliminate water trapped in wheel wells and to ensure a spotless finish on your rims and tires.

Step 5: Final Touches

After completing the drying process, inspect your car for any remaining moisture. If necessary, use a microfiber towel to gently pat dry any stubborn areas. Remember, the goal is to achieve a completely dry surface to avoid water spots.

Conclusion

Say goodbye to water spots and embrace a flawless car wash with the help of a car blower dryer. By utilizing the power of controlled air jets, this innovative tool eliminates the need for towels, reduces drying time, and ensures spot-free drying. With its versatility, convenience, and ability to protect your car’s paintwork, a car blower dryer is a must-have for every car enthusiast. Transform your car wash routine and enjoy the satisfaction of a pristine, water spot-free finish. Shop here for different car products that you might need in the future.

Fan vs. Car Blower: Which One is Right for You?

Fan vs. Car Blower: Which One is Right for You?

Introduction

Are you looking for a way to circulate air in your home or car but not sure whether to use a fan or a car blower? In this article, we’ll explain the differences between these two devices and help you decide which one is best for your needs. Remember this every week you should blower car dust to avoid throat allergies.

What is a fan?

Fans are devices that move air from one place to another by using blades or propellers. There are different types of fans, including ceiling fans, pedestal fans, and desk fans. Fans are commonly used to cool down a room or create a breeze.

What is a car blower?

A car blower is a device that blows air through a duct or vent to circulate it throughout the car’s cabin. Car blowers are built to be more efficient than fans by using a larger motor and a more powerful fan blade. They are typically found in a car’s HVAC (heating, ventilation, and air conditioning) system.

Differences between a fan and a car blower Here are some of the key differences between fans and car blowers:

Efficiency:

  • Car blowers are more efficient than fans due to their larger motor and more powerful fan blade.
  • Fans are less efficient and require more energy to move air than car blowers.

Airflow:

  • Fans produce a breeze that can cool down a room or create a refreshing feeling.
  • Car blowers can produce a stronger airflow and distribute air more evenly throughout a car’s cabin.

Temperature control:

  • Fans do not provide heating or cooling functions but can help circulate air to create a cooler environment.
  • Car blowers are part of a car’s HVAC system and can provide both heating and cooling functions.

Portability:

  • Fans are portable and can be easily moved around the house or taken on trips.
  • Car blowers are designed to be fixed in a car’s cabin and are not portable.

How to choose between a fan and a car blower

When deciding between a fan and a car blower, here are some factors to consider:

Size of the space:

  • Fans are better suited for smaller spaces, such as a bedroom or living room.
  • Car blowers are better suited for larger spaces, such as a car cabin.

Need for temperature control:

  • If you need to provide heating or cooling functions, a car blower is a better option.
  • If you need to provide a breeze or circulate air, a fan is a better option.

Efficiency:

  • If you want a device that is more efficient in cooling down a confined space, a car blower is a better option.
  • If you don’t mind using more energy, a fan can be a suitable option.

Portability:

  • If you need a device that can be moved around the house or taken on trips, a fan is a better option.
  • If you only need to circulate air in a car, a car blower is the better option.

Conclusion

In conclusion, the decision to choose between a fan and a car blower depends on your needs and the space you want to circulate air in. Fans are portable, efficient for smaller spaces, and provide a breeze, while car blowers are not portable, more efficient for larger spaces, and can provide both heating and cooling functions. By considering factors such as the size of the space, the need for temperature control, efficiency, and portability, you can make an informed decision on which device to use.

Tips for using a fan or a car blower

Here are some tips to make the most out of using a fan or a car blower:

Using a fan:

  1. Place the fan in a strategic location in the room, such as near a window or door.
  2. Adjust the height and angle of the fan to direct the airflow where it is needed.
  3. Use the fan in conjunction with other cooling devices, such as an air conditioner or a dehumidifier, to maximize the cooling effect.

Using a car blower:

  1. Set the temperature control to the desired level, either heating or cooling.
  2. Adjust the fan speed to the appropriate setting to achieve the desired airflow.
  3. Use the recirculation function when possible to circulate the air inside the car.

Conclusion

Fans and car blowers are both effective devices for circulating air, but they have different features and functions. By considering factors such as the size of the space, the need for temperature control, efficiency, and portability, you can choose the best device for your needs. With proper use and care, a fan or a car blower can provide you with a comfortable and refreshing environment. Check here for best car polisher on your car.

How To Replace A Pipe & Prevent Leaks In The Future

How To Replace A Pipe & Prevent Leaks In The Future

Introduction

If you have a leaking pipe, you know how frustrating it can be but the good news is you have a pipe relining companies Sydney near you. You may not even realize that it’s happening until the problem is out of hand and you’re left with a big mess on your hands. Replacing the pipe is no easy task, but with some elbow grease and research, anyone can do it! In this article we will walk through the steps of replacing a leaking pipe and preventing future leaks with some regular maintenance.

Identifying the problem pipe

  • Check for the leak. The first step in replacing a pipe is to find the leak and confirm that it needs to be replaced. If there’s already water damage, it may be best to just replace the entire pipe.
  • Check for signs of corrosion or leaks in other places on your house, such as inside walls, attics or basements. These could also indicate that you need a new pipe—and they’re not always easy repairs like those outside!

Preparing to replace your pipe

The first step to replacing your pipe is to shut off the water. You can usually find the shutoff valve for this in your house’s basement or crawlspace, so turn it off before beginning any repairs.

Once you have turned off the water supply, find where your leak is coming from and mark it with painter’s tape or a piece of masking tape on each side of the damaged area. Then, gather all of your tools and materials needed for installing new pipes such as:

  • Pipe cutter
  • Pipe wrench and/or channel locks
  • Flexible joints/connectors (these are what connect one section of pipe to another) – If there are multiple leaks in different areas around one pipe, you may need several flexible joints depending on how far apart they are located within this same line of PVC piping system; also consider using Teflon tape instead

How to replace a leaking pipe

  • Turn off the water. You’ll need to turn off the water before removing any piping, so this is an important step.
  • Open the valve and loosen the pipe joint. Your local hardware store should have an instructional video on how to do this, but here’s a quick rundown: You’ll first need to open the valve that leads up from your house’s meter box and then loosen one side of either a ball-and-socket or compression fitting with a wrench or pliers before removing it altogether. At this point, you’ll also want to make sure that there aren’t any debris blocking your other pipes—you don’t want them clogging up after you’ve finished!
  • Remove old pipe and install new one using a wrench or pliers if necessary! It might be easier for beginners if they use vice grips instead since these grips will keep their hands safe from injury while still making sure everything stays tightly fastened down into place without slipping out unexpectedly mid-installation process (which might cause leaks). Just remember not forget about turning off any water valves before starting work because otherwise someone could accidentally get hurt during installation process due overzealousness when trying not waste time waiting around while waiting for each step takes place slowly enough so no mistakes occur during installation process

Prevent future leaks with some regular maintenance

  • Check all of the pipes in your home for leaks, especially if you have an older home. Leaks are more common on older systems and can be hard to spot.
  • Look for signs of corrosion on pipe fittings, as well as loose connections or clogs and blockages in drainage lines.
  • Make sure that the water is draining properly from each fixture in your home; if it’s not, call a plumber to investigate and repair any issues that may be causing the problem(s).

You can fix a leaking pipe yourself with a little elbow grease and some research.

You are not a plumber, but you can do this yourself! Fixing a leaking pipe is not as hard or expensive as you might think. If you are unsure of how to fix the problem, call in a professional who has experience with plumbing leaks. It will cost less than hiring an electrician and they should point out any problems before they get worse

Conclusion

Replacing a leaking pipe can be a simple DIY project. As long as you’re careful and have the right tools, it doesn’t have to be difficult. A quick internet search will give you all the information you need about how to replace your own pipes or call in a professional if needed! Streamlinepipes.com.au are very helpful to us after we are flooded at home because of sewer leakage.

8 Ways To Clean Up Solid Waste

8 Ways To Clean Up Solid Waste

Introduction

Solid waste is a major environmental problem and requires better ways of handling it. One is providing a bin hire Adelaide in your neighborhood. Here are 8 examples of recycling and treating solid waste.

Burning in incinerators

Incinerators are complex machines that burn waste at extremely high temperatures. (They’re also called thermal treatment facilities.) By burning trash, they can turn it into a small amount of ash and water vapor, which makes them popular with people who don’t have access to landfills. They’re used in many parts of the world, including Europe, North America, Australia and Asia.

Many incinerators produce electricity as well as heat from burning garbage; this is called combined heat and power (CHP). Some incinerators also generate steam for district heating systems or treat gases emitted from the process to prevent them from being released into the air.

Incineration reduces the volume of solid waste by about 90% compared with landfills—which means less space is needed for disposal sites—and it’s more efficient than other forms of disposal such as recycling or composting because no energy is required to break down organic material like food scraps into reusable materials like compostable plastics.[1]

Landfills

Landfills, the most common method of solid waste disposal in the United States, are often a source of environmental concern. This is because they typically involve burying waste in a hole and covering it up. This not only prevents us from seeing what we’re doing—and therefore feeling responsible for our actions—but also has an impact on groundwater, soil quality and air quality. Landfills also require a lot of space; if you live near one you may find yourself with little room to play or breathe fresh air due to their proximity to your home. Thankfully there are ways around this problem!

Recycling and composting

Recycling means converting waste materials into new products, such as paper products or aluminum cans. Composting is a way to recycle organic waste, such as food and yard trimmings.

Recycling and composting are important because they reduce the amount of solid waste going to landfills—and landfills produce methane gas that can harm the environment by contributing to climate change. Recycled materials are also used to make new products like recycled plastic lumber or glass bottles that have been made into windows for homes and businesses.

Waste-to-energy

Waste-to-energy is a recycling process that can be used to convert municipal solid waste (MSW) into energy. The goal of this process is to create electricity, heat, or transportation fuels from MSW. Waste-to-energy plants are also sometimes called “energy from waste” plants or even “waste incinerators.”

There are three main ways you can use waste for energy: incineration (burning), pyrolization (using heat to turn the material into liquid), and gasification (using high temperatures and pressure in order to change solid materials into a synthetic gas). All three methods have their pros and cons, but they have one thing in common: they all require tons of trash!

Liquifying solid waste by anaerobic digestion to produce biogas or biofuel.

  • Liquifying solid waste by anaerobic digestion to produce biogas or biofuel.
  • In this process, organic materials like food scraps and plant debris are converted into biogas. The gas is produced by a reaction between the organic matter and microbes in an oxygen-free environment. Biogas can be harvested from the digester tank and used as fuel for on-site heating systems or used as an input into other processes that convert it into electricity, heat, or transportation fuels like ethanol (which we’ll cover later).

Mechanical biological treatment (MBT) – combines mechanical and biological methods of waste treatment.

Mechanical biological treatment (MBT) is a combination of mechanical and biological methods of waste treatment. MBT involves the breakdown of organic substances by microorganisms in an anaerobic environment.

  • MBT is used to treat organic wastes, sewage sludge, animal manure and food processing waste.

Waste sorting – separating the recyclables from the rest of the waste.

Waste sorting is the process of separating waste into recyclables and non-recyclables. It goes beyond recycling, as it also involves disposal of non-recyclable things that can be reused or composted.

The best way to sort your own waste is by identifying what type of products they are made up of, and then finding out where they can be disposed of properly. For example, if you have a paper towel with bits of food still on it, it’s not clean enough for recycling: you need to wash it first before throwing it out in the bin!

You should also keep an eye on how much plastic you buy in comparison with other materials (e.g., glass bottles vs aluminum cans) so that your household does not become too dependent on single-use plastics like straws or takeout containers which cannot easily be recycled at home due to their size limitations or because they contain multiple types which cannot be separated manually; instead try using reusable containers such as jars instead!

Here are 8 examples of recycling and treating solid waste.

You can burn waste to generate energy. You can use landfills to store waste. You can recycle waste. You can compost waste. You can turn waste into fuel. Or, you might use mechanical biological treatment (MBT) to treat the solid wastes you create in your life and business, turning them into water and soil amendments that you can reuse on site or sell to other companies that need similar materials for their operations.

To learn more about these different methods of treating solid wastes, visit [The Solid Waste Association of North America](https://www.swana-net/).

Conclusion

Hopefully, you’ve found this post useful and informative. It can be hard to find solid waste treatment solutions that are practical, cost-effective and environmentally friendly. While we still have a long way to go before there is a global system that treats all our solid waste in an efficient manner, there are many options available today for treating your own solid waste at home or on the job site.

The 7 Best Tips to Make A Business Signage That Lasts For Years

The 7 Best Tips to Make A Business Signage That Lasts For Years

Introduction

There are tons of businesses that have a lot of success because they had an eye-catching sign on their building. This is a great way to draw customers in and boost sales, but it’s important to remember how easy it is for these signs to fade and become damaged over time. If you want your business signage to last for many years (or even decades), then you’ll want to follow this list of tips:

Buy High-Quality Materials

  • When buying a sign, make sure that it is made of high-quality materials.
  • A sign made of low-quality materials will not be resistant to weather and other environmental factors.
  • A sign that is resistant to weather and other environmental factors will last longer than one that isn’t.

Use UV Laminated Vinyl Signage

You can also use UV laminated vinyl signage that is more durable than other materials. It is resistant to fading and weathering, so it will last longer than other signs. In addition, it’s easier to clean than most sign materials because of its smooth finish.

Choose The Right Signage For Your Business

Now that you’ve decided to display your business signage, it’s time to choose the right type. There are many signs available, but some are more suitable than others.

The following factors should be considered when choosing a sign:

  • Visibility – The sign should be visible from far away so that people can find it easily. If you’re planning on putting up a huge billboard in an industrial area, then visibility is the most important factor and size is not as important. On the other hand, if you plan on opening up another restaurant near your current one, size will matter more here because customers won’t have to travel far before seeing your signboard and recognizing it as yours.
  • Readability – Good-quality fonts can make all the difference between having an unreadable signboard and having one with readable text that conveys its message clearly across any background (e.g., busy street). There are also certain colors that work well for different types of businesses such as red for sports bars or blue for ice cream parlors! If you’re unsure about what color scheme works best with your company’s branding strategy then we recommend contacting us today at Aesthetic Design Co! We’ll help find something perfect within budget constraints while meeting all requirements set forth by city planners.”

Make Sure To Place The Signage On A Vulnerable Location

  • Place the signage on a vulnerable location. If you want your business signage to last for years, make sure to place them in a spot where they can be easily seen by your customers and passersby. It should be placed near entry points so that you can attract more traffic and increase foot traffic.
  • Make sure that it withstands the elements. If you live in an area where there are extreme weather conditions such as rain or hail, place your signs in areas away from potential damage caused by stormy weather conditions. Also, keep in mind that if it is placed near the entrance or exit of your store or shop, this will allow people who are entering or exiting your establishment to see it immediately which will help boost their interest on whatever product or service that you offer them!
  • Determine whether there are any obstructions around where you want to put up your signages before deciding on its placement because if there is then chances are high that visibility will be limited thus hindering its effectiveness as well as its longevity!

Hire a Professional to Make Exterior Signs

Hiring a professional to make exterior signs is the best way to ensure that your signage lasts for years. A sign company will be able to help you choose the right materials and placement, color scheme, fonts and more.

Keep Your Signage Clean and Protected

  • Keep your signage clean
  • Protect your signage from the elements
  • Protect your signage from vandalism
  • Protect your signage from weather damage
  • Protect your signage from wear and tear

Know Which Colors Will Fade Faster

As you consider paint colors, keep in mind that certain colors fade faster than others. Red, yellow and orange are known to fade the fastest, while darker colors will last longer. If you want your signs to look as good as new for years to come, choose a color that’s less susceptible to sun damage. Here are some examples of colors that tend to fade:

  • Black
  • Navy blue
  • Dark green or teal green

If you want your signage to last for many years, then you have to follow these tips.

Having a well-made business signage is a way for you to express your brand’s identity. It is also the best way to attract customers who might have not known about your business. The most common sign types are neon signs, metal signs, plastic and glass signs, LED signs, and digital banners. All these options can be customized according to your needs and budget.

If you want your signage to last for many years then follow these tips:

  • Choose High Quality Materials
  • Use UV Laminated Vinyl Signage
  • Choose The Right Signage For Your Business

Conclusion

We hope that this article has helped you understand the importance of choosing a high-quality business sign and how to get it. Before you go out and make your own signage, check out our website on how our signwriters Sydney work in an extensive collection of signs for all kinds of businesses.

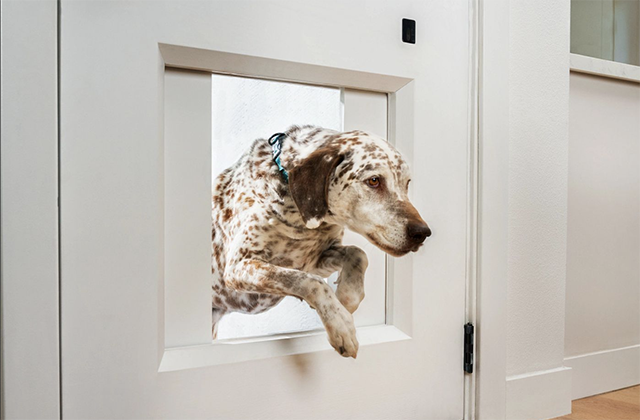
What To Consider When Buying A Pet Door

What To Consider When Buying A Pet Door

Introduction

A pet door is a good way to let your animal use the outdoors without having to be constantly supervised. They can go in and out whenever they want, but you can make sure that they’re not getting into trouble or causing damage by setting limits on when they are allowed outside. There are many different kinds of doors available for different animals and uses, so choosing the right type for your needs can be tricky. Here are some things to consider when making your purchase:

Size of the Door.

The size of the door you choose will depend on your pet’s size. A smaller door is better suited for smaller dogs, while larger doors are best for large dogs and can even accommodate multiple pets.

The animal that will be using the door.

Before you go shopping, it’s important to consider the size of the door and what type of animal will be using it. The height and width of a pet door will depend on your animal’s height and width. In addition, you’ll want to make sure that your pet door has a secure lock that prevents other animals from entering or leaving through it. You should also think about how well insulated your new pet door is, as well as what kind of weather protection it offers in order to keep out any unwanted elements like rain or snow.

Locking mechanism.

The locking mechanism on the pet door must be sturdy and secure. It should not be flimsy or easy to break. The door should lock automatically when it has been closed, but there should also be a way for you to manually lock it as well if needed.

The same goes for unlocking the pet door: there should always be a way for you (or anyone else who needs access) to unlock it from either side of the fence or wall. If your dog is going outside frequently, this can save some time in opening their own ways back inside each time they need entry!

A feature that many people like is an auto-locking system which actually latches or locks itself after being opened by a pet. This prevents any accidental openings that might occur during times when someone isn’t home

Installation Location and Manual vs Automatic Doors.

Installation Location and Manual vs Automatic Doors

The location you choose for your pet door is one of the most important factors when buying a pet door. The best location will vary from home to home, depending on things like:

  • Number of pets in the house
  • Type of weather (cold or hot)
  • Current temperature outdoors

If you have an older or disabled pet as well, it’s important that you consider how difficult it will be for them to access the pet door. If they’re not able to get in and out by themselves, then installing a manual option with fewer moving parts may be your best bet. A good rule of thumb here is if they struggle getting up and down stairs or can’t lift more than 20 pounds on a regular basis then take this into account when thinking about what type of setup would work best at home

Energy Efficiency.

For example, if you have a large dog that likes to play ball or go for long walks in the park, you’ll want to make sure the pet door can accommodate them. If your pet is small, on the other hand, you won’t need a large-opening flap (think cat or hamster).

Even if you’re only looking at one brand of pet door and it says it’s energy efficient, there are still several factors that can impact how much energy it uses:

  • The type of insulation used in manufacturing. If a company uses air tight seals without any added foam or plastic around them then this will help keep heat inside and out.
  • The size of the opening itself. If there are smaller flaps then they require less power than larger ones do because they don’t have as much surface area through which warm air can escape into cold air outside your home so they tend not use as much electricity when left open all day long with minimal movement throughout its lifespan–but only if installed properly!

Security Aspects.

A pet door should be secure. You want to make sure it’s impossible for animals or children to open. A well-constructed pet door will not allow your pets to accidentally get out, nor will it let intruders into your home.

If you have any concern about the security of a product, ask questions about it when you’re buying the product. For example, if you’re buying a standard single flap door with no locking system and want to be sure that your cat won’t be able to push its way through, ask how sturdy this type of door is made and whether or not it can withstand determined assaults. If someone doesn’t know their product very well, they may give vague answers or just say “yes” without really understanding what kind of pressure might cause damage—but if they do know their stuff, they should give detailed explanations so there aren’t any surprises later on down the line when something goes wrong (which could happen!).

Pet doors are a great way to give your pet more freedom, but it’s important to consider which type of door would be best for your pet and home.

Pet doors are a great way to give your pet more freedom, but it’s important to consider which type of door would be best for your pet and home.

“They’re an excellent way to open up your home,” says Williams. “You can easily install them in existing walls without having to replace anything.” In addition to providing security for you and your family, it gives your dog or cat the chance to go outside whenever they want—and come back in when they’re ready. You don’t have to worry about leaving the house with them unattended during the day because they’ll be able to take care of themselves while you’re away!

If you’re worried about intruders breaking into your house while you’re sleeping at night and stealing things like TVs or jewelry (or even worse), installing a pet-friendly door will allow them access into any room that isn’t locked securely shut–but only after unlocking it with their paws first! This makes burglars think twice before trying anything funny since there may already be a dog inside waiting patiently behind its own personal entrance way.

Conclusion

We hope this article has helped you understand the many considerations that go into choosing a pet door. There are so many options out there, and it can be overwhelming to choose one over another. But if you remember to keep your pet’s needs in mind and consider where they will be using the door, it becomes much easier! Find out here on how to choose for pet door.

The Dos and Don’ts of Proper Waste Disposal

The Dos and Don’ts of Proper Waste Disposal

Introduction

No one wants to think about their trash. It’s a necessary part of life, but it doesn’t have to be a negative one. When you know the proper way to dispose of certain items and how not to dispose of others, you’ll feel better about your contribution to the environment. Here are some tips for proper waste disposal from our friendly neighborhood waste management company:

Don’t throw away your trash in someone else’s garbage can.

Don’t throw away your trash in someone else’s garbage can. You can easily dispose the green waste through bin hire Adelaide.

It may be tempting to use an unfamiliar dumpster when you are trying to get rid of something, but it is always best to check if the dumpster is actually yours first. Not only could it be a health hazard for you and others, but it can also lead to legal problems if the owner sees what you have done or finds out about it later on.

If you want other people to clean up after themselves, then you should do so as well!

Use the proper waste receptacle, based on what you’re discarding.

There are a few things you should keep in mind when disposing of your waste, based on the type of waste being discarded.

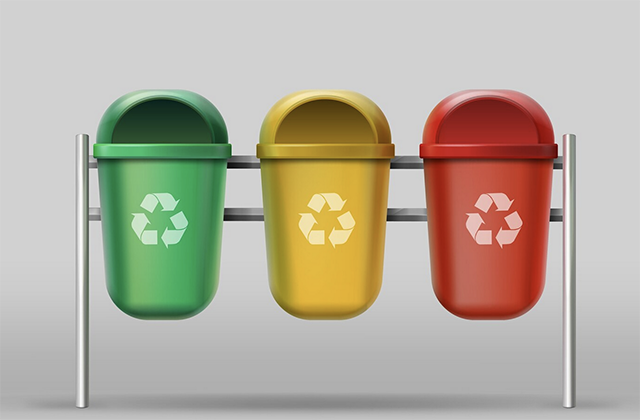
  • For organic waste, such as food scraps and yard debris, use a compost bin.
  • For recyclables like paper and cardboard, place them in their own trash receptacle.
  • For hazardous materials like batteries or chemical products not intended for residential use (e.g., pool chemicals), place them in the small red-topped container near the curb for proper disposal by government crews.

Compost materials whenever possible.

Composting is a great way to reduce the amount of waste you produce and keep organic materials out of the landfill. If you live in an apartment or condo, it’s difficult to compost food scraps in your kitchen; however, there are other options for composting that are easy and inexpensive. For example, if you have access to a balcony or patio area where you could set up a small compost bin outdoors, this can be an easy way to get started. You can also use worm bins at home or look into community events where people gather together with their outdoor compost bins (like freecycle groups). Composting has many benefits: it saves money on buying fertilizer; it helps fertilize gardens; reduces greenhouse gas emissions (which contribute to global warming); makes soil healthier and more fertile; creates jobs by recycling resources which ultimately leads towards reducing waste production across industries overall!

Throw away items that have been recalled to your local recycling center.

One of the biggest issues with waste disposal is the constant stream of items that have been recalled. If you’re not careful, these items can end up in a landfill and create toxic fumes when they break down.

If an item has been recalled, do your best to get rid of it responsibly. You might think that just throwing out an appliance or piece of clothing is fine—and it may be—but make sure you do some research first. If there are any issues with how much hazardous materials were used during production or if there are any other concerns about how safe the product actually is, then take that into consideration before tossing it out.

You should also know where to take your item for recycling purposes: usually this will simply be a local recycling center or hardware store that accepts those types of items most often (or at least wants them). Make sure you have all the proper documentation on hand so that they know exactly what type(s) of material(s) were used in its creation and how much danger those materials could cause if not disposed properly after use!

Don’t put televisions, laptops/tablets/phones or other electronics in with regular trash! They contain harmful chemicals like lead which cannot be recycled easily by machines at landfills; instead throw them away separately from household waste via electronic retailers’ drop off points specified for such things.”

Don’t put batteries in the trash.

Batteries are a common household item, and it may be tempting to throw them in the trash when they’re empty. However, batteries can leak and cause fires if they’re not disposed of properly. So if you’re tossing your old batteries in the trash, think again. Instead of throwing them away with regular garbage, take them to a local battery recycling center where they can be properly recycled and reused so that no toxic chemicals will go into our landfills or wastewater systems.[1]

Don’t dispose of hazardous materials in your regular waste stream.

If you have hazardous materials, such as paint or cleaning products, don’t dispose of them in your regular waste stream. These materials are toxic and can harm the environment. If you are disposing of these items at home, make sure that they are properly packaged and labeled so they can be disposed of safely by a professional waste disposal company.

If you have used hazardous materials at work or at school and need to dispose of them, contact your local sanitation department for more information about how to safely get rid of them.

Don’t dump oil or gas down a storm drain or the street, or pour it down the sink.

You’ve heard it before: the best way to dispose of oil, pesticides and other hazardous materials is through your county’s Hazardous Waste Program.

We know you have a lot on your plate and that it’s sometimes hard to keep track of what can go where. So here are some dos and don’ts for proper waste disposal:

  • DO NOT dump oil or gas down a storm drain or the street, or pour them down the sink. These chemicals can contaminate local surface water bodies like rivers, lakes and oceans.
  • DO choose more sustainable options when purchasing new products (this includes things like electronics). For example, if you have an old phone that still works but no longer supports current software updates, consider donating the device instead of tossing it into the trash bin where harmful chemicals from its production end up in landfills or leach into groundwater resources when buried underground—and remember that used electronics contain toxic materials such as lead that can contaminate soil around landfills/land fills if not properly handled!

When replacing electronic equipment, bring them to a facility for safe disposal.

The next time you replace an electronic device, such as a television or laptop, don’t just throw it away. Instead, take it to a recycling center. While about 80% of the material in a typical computer can be recycled, only about 15% of this is actually recycled due to lack of infrastructure and consumer awareness.

Take care of your environment by disposing of waste properly!

It’s important to dispose of your waste properly. When you throw away your trash, make sure that it goes where it belongs. Don’t throw away your garbage in someone else’s garbage can or recycling bin. This can be dangerous for the environment and for other people who use those receptacles.

Make sure that you use a proper waste receptacle based on what you’re discarding:

  • For general household trash and recycling, there should always be a separate container for each type of waste at home and work. This way, no one will have to mix their recyclables with their garbage or vice versa!
  • If you have compostable materials such as food scraps or yard waste items like leaves and branches, these should go into compost bins instead of regular ones so they do not get thrown out accidentally later on down the line during daily cleaning routines around town!

Conclusion

In conclusion, we hope that these simple tips will help you to be more environmentally conscious. Remember, the best way to keep our environment healthy is by taking care of our waste disposal and recycling efforts!

Car Detailing Tips You Won’t Learn In Auto Shop Class

Car Detailing Tips You Won’t Learn In Auto Shop Class

Introduction

You may be the proud owner of a car, but if you don’t know how to detail it properly, it won’t stay that way. Detailing is an art form, and anyone can learn the basics. It takes practice and patience (and maybe even some investment in new tools), but if you want your car to look as good as it did when you bought it years ago, read on! The purpose why I need to put a ceramic coating Melbourne because it acts as a preventative layer against dirt, grime and stain marks.

Keeping the interior clean is key.

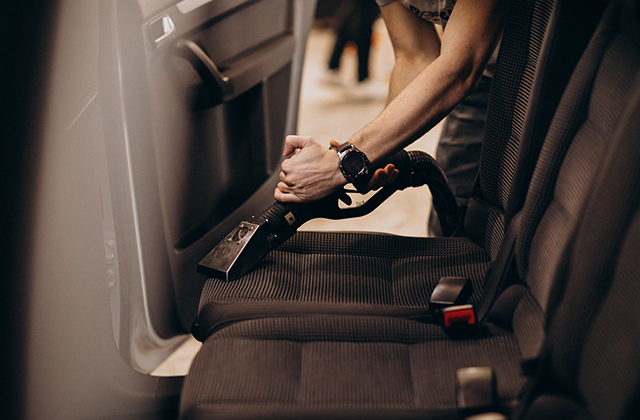
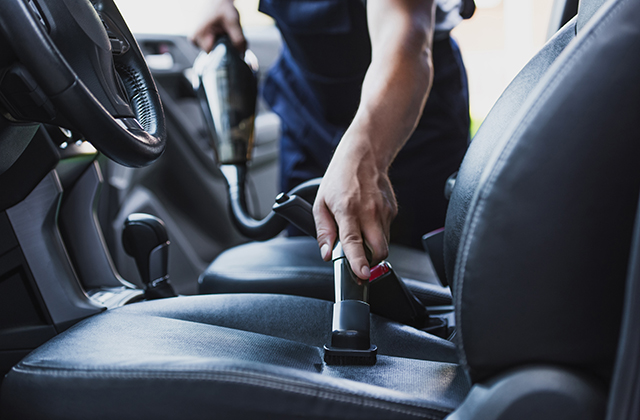
The interior of your car is just as important to keep clean as the exterior. It is a good idea to remove any stains or spills immediately. You can use a vacuum cleaner, damp cloth, car shampoo or detailing product to clean your car’s interior on a regular basis.

If you have pets in the car, they may leave pet hair behind that can be difficult to remove. You can use an upholstery brush or handheld vacuum cleaner to remove hair from seats and floors of the vehicle. Avoid using water-based cleaners on upholstery because they will cause dirt marks if left too long before cleaning them off again with another product like leather cleaner spray which works well for removing water-related stains but won’t hurt the fabric itself if done properly.”

You need specialized tools that aren’t just for cars.

You’ll need your own tools. Don’t assume that you can use any old thing lying around. You will be using many different tools and chemicals, so it is important to know what to buy, how to store them properly and how to clean and maintain them.

  • You should have a variety of brushes for different purposes: bristle brushes, soft-bristle brushes, wool mitts, foam applicators and microfiber cloths all come in handy during the detailing process.
  • A quality car sponge can make a big difference when cleaning your vehicle; it should be firm enough not to fall apart but still soft enough not to scratch any surfaces (including paint).
  • Microfiber towels provide excellent protection for delicate surfaces like glass or chrome trimwork on older cars because they are lint-free and strong yet very pliable due to their tight weave structure (microfibers are smaller than one millimeter).

Better tools will help you do a better job.

You can’t do a great job without the right tools. You need to know what you’re doing, and have the right tools for it. There are many possibilities, but only if you know how to use them correctly.

Know your products.

  • Know your products.
  • Know how to use them.
  • Know how to apply them.
  • Know what they are good for.
  • Know what they are not good for.
  • Learn how to clean them, store them and dispose of them properly (most products have a shelf life).

Keep it top of mind with a checklist.

Checklists are a great way to keep your car detailing project on track. They help you stay organized and make sure that you don’t forget anything important. If you’re like me, it’s easy to get distracted by something shiny and forget what the heck I’m supposed to be doing when cleaning my car!

Whether or not you have a checklist yet, try using one of these ideas:

  • Keep a checklist in your glove compartment (or wherever else is convenient) so that it’s always visible when needed. You’ll never have any excuse for forgetting anything again!
  • Update your checklist before every trip; this way if there’s ever any confusion about what needs done between visits, there will be no worries.
  • Keep the checklist somewhere easy to reach at all times so that it doesn’t fly out of sight after only being glanced at once or twice during use – this way, everyone can see how much work still needs done without having someone constantly reminding them where things should go!

Car wash preparation is the key to success.

Before you drive your car into the automatic wash, do yourself a favor and give it an extra-thorough cleaning. Start by using a soft-bristled car wash brush to remove dirt and grime from the surface of the vehicle, both inside and out. Then use a high pressure nozzle attached to your hose to blast off any lingering dust or debris that remains after brushing. If you have some stubborn stains—like bird droppings or sap—use an upholstery cleaner like Simple Green on those areas specifically before moving on with your wash routine.

Once your vehicle looks good from top to bottom, take all of these products inside with you (you’ll want them for later steps) and proceed through the now-empty self-service bay; pay attention as each step is completed so that when it comes time for hand washing (see below), everything will be ready!

Eliminate water spots.

If you plan to spend time detailing your car, it’s a good idea to invest in a few microfiber towels. These absorb water quickly and dry without leaving streaks or spots on the paint job. A chamois cloth is another tool that will help you remove excess water from the body of your vehicle. You can also use products like drying aids which will help prevent water spots from forming when you’re washing your car.

Good lighting is important.

Good lighting is important to your detailing efforts. Good lighting helps you see all the nooks and crannies of your car, allowing you to treat them more efficiently and thoroughly. The best way to get adequate light for car detailing is by using a combination of natural sunlight and artificial lights, both of which are easily adjustable for maximum effect.

Natural sunlight can provide excellent illumination for your car’s interior during daylight hours, but if it happens to be overcast or raining outside (or even if it’s just at noon), then you need some other sources of light as well—especially if your garage has poor natural lighting conditions.

Artificial lighting can be purchased in various forms: halogen work lamps with long-lasting bulbs; LED spotlights that emit bright white light; fluorescent tubes that produce an even blueish glow; or even portable halogen flood lights used by construction companies when they’re working on cars in a private garage.

Freezing weather can be a challenge for car care.

As winter approaches, it’s important to know how to keep your car in tip-top shape. While you may think that snow and ice are the least of your worries when it comes to taking care of your ride, they can actually cause significant damage if not dealt with properly.

For example: if you’re driving on a freezing day and have a window open slightly (or if someone else has opened it), then you run the risk of having frozen water or snow fall onto your vehicle’s paint job. This can result in paint chips and scratches due to the temperature differences between glass and metal surfaces. Additionally, salt residue from roadways can also be damaging for this reason—especially since most modern cars have clear coat finishes that make them susceptible to such damage.

Similarly, ice buildup on windows is a major issue during wintertime car care because it can lead directly back into poor visibility as well as potentially damaging windshield wipers by clogging them up with slushy ice chunks instead of simply melting when exposed directly against grated blades during usage

You need to know how to detail a car if you own one, even if you don’t plan to do it yourself

If you own a car, then you need to know how to detail it. The reason why is because even if you don’t plan to use any of the products that go into detailing, you’ll still need to know how they work. For example, let’s say your windshield wipers are starting to get clogged with dust and grime from being in storage for months at a time. When this happens, it’s not enough just to replace the wiper blades; you also have to clean off all of the gunk from around them so that they can effectively do their job when needed.

Conclusion

Car detailing can be a rewarding experience, but it can also be a challenging one. If you know what you’re doing, the results will speak for themselves and help you stand out from the crowd. Fineshinedetailing.com.au continues to do a great job in car detailing field.

Outdoor Advertising Effectiveness

Outdoor Advertising Effectiveness

Effective outdoor advertising guides the customer for your door. This sounds simplistic, but a customer has many choices when navigating a street, a sidewalk, or perhaps a parking lot. With the amount of ambient frustration in the world, the most welcoming business that’s easy to find includes a huge edge on an anonymous and impersonal building with no directional signage. You are able to analyze your customers’ advertising preference by starting at the door of your business, then working at the right path outward. Even the roof of your vehicle can be serves as your advertisement, with vehicle signage Sydney every part of your vehicle is important.

From site-specific needs on your front sidewalk, extending outward towards the parking area, then analyzing traffic patterns that optimize your exposure, you are able to create a step-by-step system that lowers frustration and targets the shoppers who need to find your business. So how exactly does your front door look? Effective outdoor advertising begins with the appearance of the building’s main entry. Examine a business like Burger King, where every move that a customer makes has been analyzed to improve high-volume “table turnover,” and you can observe a clear strategy.

The leading door has some architectural enhancements that command attention. If not, the customer wanders a bit when exiting the car and at risk of the doorway, along with a minute lost is a potential reduction in profit. Your door must have a sign nearby, or building-mounted, that says “main entrance,” or “front door,” like a primary element of effective outdoor advertising. Directional signs, usually two feet tall or less, with arrows, should point the customer in the parking area to the door. In many city sign age these small signs won’t count against your overall copy area restrictions, and they do offer several advantages.

Insurance providers are becoming more sensitive to the idea of Crime Prevention Through Environmental Design, or CPTED. Like a business owner, explore to want your customers to invest money, but to feel safe on your site. The principles of CPTED suggest that the greater obvious the entrances are made to look, the highly effective a business site will be in accomplishing a safe environment. Effective outdoor advertising and a safe site plan have many elements in keeping.

The path towards your entry point, between your building and the parking area, can start welcoming your visitors and displaying your brand or logo, with directional signs. Within the parking lot, should you share space along with other businesses, try to establish which spaces are for your customers, and begin the directional signage at that time, as a key factor of the outdoor advertising. Guarantee the walkway between the parking spot and the entry is welcoming and simple to navigate, having a signage style that starts with an over-all welcome, then gets to be more specific. For instance, at apartment leasing offices, one often encounters signs near the bumper of the parking bay that say “Parking for Future Tenants.” This kind of greeting sets the mood before the possible client exits their car. Make a similar slogan that sets up a buying assumption, so the parking area becomes a part of your effective outdoor advertising and marketing plan. So how exactly does a customer spot your parking area and make the correct turns off the main road?

A bit more studying may be warranted to optimize the size and placement of your roadway identity. Since your total signage copy area is often limited by local signage codes, do not block your main identity by placing it behind plant materials. Place it from other business signs, if at all possible, to prevent driver confusion. Should you share a multi-tenant sign with several other businesses, persuade your home manager to keep the multi-tenant lettering as large and eye-catching as you possibly can. If your logo or a typestyle utilized in branding can be shown, that image should appear on the multi-tenant sign. Signage plans often start with the faulty assumption that the large building-mounted sign will have more impact than several ground signs or monument signs. At the driver’s eye level, in which the turn is made, is the point at which the outdoor advertising is important in behavior. Examine the website layout of the “Chili’s” restaurant, and you’ll see some signage about the building, but usually there are two or even more moderate-sized ground signs appearing in the point where a driver needs to turn off the street.

Obviously, the driver can also spot the building and recognize it due to the million-dollar branding effort of sophisticated advertising. However, the “turning points” for that driver are usually marked by smallish lighted ground signs, without any shrubs to block their impact, and many businesses can benefit from a similar strategy. Match it up to the confusion of competing pylon signs, the place where a number of businesses keep attempting to exceed the height from the previous sign. Groups of elevated signs happen to be studied on roadways with high accident counts, and driver confusion seems to rise in this situation.

Holiday destinations, for example, example,example, for example, Virginia Beach, Las Vegas, and Orlando have many roads that relate this safety problem. To keep the sign age to the motive force, safer for that driver, and less visually confusing, monument signs having a height limit of 3 to 6 feet are effective. Other considerations for outdoor sign placement include the directional traffic counts from the surrounding roads, which might show that an east-facing sign works better than north, for instance.

Traffic counts for roadways may be requested out of your local transportation planning department. By guiding the customer from general decisions to be more specific, be more specific,to be more specific,your outdoor advertising is capable of peak effectiveness. Keep in mind that most people are a pedestrian, the moment we leave our vehicles. For this reason, it’s good for providing narrated path when pedestrians take prescription your website, partly for safety’s sake. Keep reminding them, welcoming them, and marking the doorways clearly, and your customers will appreciate the helpful guidance. Click here for doorway signages.

Article Source: http://EzineArticles.com/5887759